Nutritarianism

Tuesday, November 30, 2010

Whole Wheat Pie Crust


As promised, I offer you my new favourite pie crust recipe. I hadn't made pie crust in like forever! For eons I've bought frozen pie shells in the aluminum pie plates. Since that's no longer an option for one who's eating for health and not convenience, this means baking my own.

Was it always this easy to make a pie crust?


The original recipe can be found here:

Giddy Gabby's Single 9" Whole Wheat Pastry Shell Recipe

Here is my adapted version:

Whole Wheat Pie Crust

***Chill your mixing bowl and pastry cutter.***

This is for one single unbaked pie shell.

1 cup whole wheat flour
1/2 cup unbleached white flour
2 tsp. sugar
1/2 tsp. salt
1/2 cup (1 stick) Earth Balance Vegan Buttery Flavour Stick
3-5 Tbsp. almond, rice, soy, or hemp milk (I used 3 Tbsp)

Combine the flours, sugar and salt. Slice cold Earth Balance stick into flour and cut in well with a pastry blender until smallest pieces are the size of peas.

Using 1 Tbsp at a time, sprinkle cold non-dairy milk and cut in. Continue adding more milk until it's just moist enough to stick together.

Using just your finger tips (this avoids transferring heat from you palms), quickly form a ball.

Lay out a large piece of wax or parchment paper onto the counter and sprinkle with flour. Take your ball of pastry and roll it out until about 1/8" thick.

To transfer the dough, roll up the dough onto the rolling pin, then let it unfold off of the rolling pin into the pie pan.

Gently pat and push into place. Work the edge by pinching it to give it a fluted edge*.

*I didn't use this site, but it looks like a great place for ideas: Decorative Pie Crust Edges.

I didn't do anything further to the crust. I didn't actually need the crust until the next day, so I placed it in a large freezer bag, sealed it shut with a twist tie, and put it the fridge. It worked beautifully for my Festive Chickpea Tart.

Monday, November 29, 2010

Whole Wheat Hotdog or Hamburger Buns


Oh me oh my these things are good. If you like mooshy gooshy buns (of the food kind) like I do, you'll understand my enthusiasm over mastering making these squishy blobs of bready joy.

You can shape them into long buns for seitan sausages, or round ones for veggie burgers.

The original recipe is Vegan Dad's. That guy is a seriously talented chef! My adapted version has a much simpler method, and is a half batch. This will give you either 6 sausage or 6 hamburger buns.


Whole Wheat Buns

[Adapted version of Vegan Dad's Whole Wheat Hamburger Buns]

1 1/2 cups whole wheat flour
3/4 cup + 2 Tbsp unbleached white flour
1 1/2 Tbsp vital wheat gluten
1/2 cup water
1/2 cup almond, soy, rice, or hemp milk
1 1/2 tsp active dry yeast
1/2 tsp sea salt
1 Tbsp oil

Combine non-dairy milk with hot water to produce a warm liquid. Add yeast, stir and let sit 10 minutes.

Combine flours, gluten, and salt.

Add oil to liquid and yeast.

Add wet to dry. Mix well with a wooden spoon, then turn onto floured surface and knead until soft.

Place in a well-oiled bowl, turning dough to coat. Cover with plastic wrap and place in a warm place for 1 hour, or until double in size.

I love it when it's risen!

Punch dough down, knead a few times. Form into your buns (sausage/sub size or hamburger buns). Place on parchment paper lined cookie sheet(s). Cover with towel and let rise 30-45 minutes.

Preheat oven 450.

Bake 10* minutes.

*Mine were done in 5 minutes! Tap the bottom of the buns to check for that "hollow" sound. That means they are done.

Sunday, November 28, 2010

Festive Chickpea Tart

right before going into the oven

Chickpea pie. Doesn't conjure up imaginations of delightful indulgence does it? Surprisingly enough, this unnatural combination of words didn't stop me from trying out Dreena Burton's (a fellow Canadian I'll have you know!) very recently posted recipe for Festive Chickpea Tart. Boy Canada sure has it's fair share of fabulous cooks and cookbook authors! Her book, Eat, Drink & Be Vegan, is on my wish list, the short one.

it's impressive enough in it's uncooked state!

Back to the pie slash tart. I made it on Saturday night for supper, and served it with a salad. I'll admit that I spent the first few moments of the meal focusing on my salad. I was stalling. Believe me, the pie looked gorgeous. I had high hopes and was afraid to find out the truth. Curiosity eventually got the best of me. With fork held in guarded trepidation, and a muttering of "well, here we go", I moved to serve up my first morsel.

My salad soon became a wisp of a memory.

Each bite tasted better than the last, and in the end I knew I was hook-line-and-sinker in love. Why? It's the epitome of comfort food without the fuzzy bunny slippers. It says gourmet and good old fashioned home cooking all at the same time.

Here is the official description of the Festive Chickpea Tart:
Move over faux turkeys! This savory tart takes center plate with its combination of chickpeas, crunchy walnuts, spinach, and seasonings nestled together. This dish is elegant enough to serve for holiday gatherings, but also easy enough to make for a family dinner any time of the year.
On Dreena's Vegan Recipes blog, she suggests serving it with cranberry sauce. Oh how I wish we had had some, it would have made it even more scrumptious. Or gravy. Mmmmm.

click on the photo, you must get a closer look! yum!
(yes I have old blue kitchen counters. weep for me.)

This is most definitely going to make an appearance on our dinner table come Christmas Day!!

I was trying to photograph the pie when Jon
decided to contribute his opinion to this blog. Cute.

In the next few days I will blog about the vegan pie crust recipe I used. It's the best one I've used by far, though for any nutritarians visiting, it's not Eat to Live compliant. It would fall into the "eat rarely" section of the nutritarian pyramid!

Saturday, November 27, 2010

Breakfasty Things


No artery clogging bacon and eggs with butter-slathered toast to be found here. Sure that stuff tastes good, but is it good for you? And what's it doing to your waistline! I know what it did to mine...jiggle jiggle.

The photo above is a combination of banana, frozen raspberries, and frozen peaches all blended together in my food processor with a bit of almond milk. The last half I added more water and drank it. Very pretty.


This next sample is an oatmeal breakfast bar. They're officially called All-Out Best Oatmeal Breakfast Bars. The recipe can be found here. I got Jon to try a piece shortly after coming out of the oven. He said, "It's not bad." A few minutes later, "Hmmm, it's starting to grow on me. This is pretty good. Can I have another?"


I want to avoid having us eat processed foods, so I was hoping this would be a great replacement for the granola bars my son has been getting in his lunch. This morning my son asked me, "What are those things dad put in my lunch?". I told him they're like a granola bar. I didn't want him thinking "magic cookie bar" or anything like that and end up setting him up for disappointment. I mean I did splurge and put carob chips in them (which by the way taste AMAZING!).

Well, it turned out that he didn't like them and could only manage eating one. After giving it a taste test (I avoid sugar and hadn't eaten one yet) I had to agree that they didn't work out. I think a good dose of tweaking might turn things around for them. I'll have to keep experimenting.

Friday, November 26, 2010

Eggplant Walnut Spread or Dip


Eggplant has always intimidated me. I tried to make homemade babaganouch about 5 years back and it was a serious flop. Oh a whim I ended up purchasing a nice eggplant last week since they were on sale. I'd seen the odd vegan recipe calling for it in it's ingredient list so I figured I'd give it another shot. It sat in the fridge for a few days, making me feel guilty.


I found a recipe in Robin Robertson's "1000 Vegan Recipes" that looked easy enough for my second-ever attempt at handling this purple vegetable. A little googling led me to discover that this dip was a definite favourite amongst those who'd made it.

Let me simply state that eggplant and I are now best buds! I think this spread would be great as a condiment in a wrap sandwich, or as a dip for homemade crackers.

Did you know?
Researchers at the US Agricultural Service in Beltsville, Maryland, have found that eggplants are rich sources of phenolic compounds that function as antioxidants. Plants form such compounds to protect themselves against oxidative stress from exposure to the elements, as well as from infection by bacteria and fungi.

The good news concerning eggplant is that the predominant phenolic compound found in all varieties tested is chlorogenic acid, which is one of the most potent free radical scavengers found in plant tissues. Benefits attributed to chlorogenic acid include antimutagenic (anti-cancer), antimicrobial, anti-LDL (bad cholesterol) and antiviral activities.
~ whfoods.com


Thank you Robin Robertson where ever you are for such an easy impressive dip!

Thursday, November 25, 2010

Happy Thanksgiving from a Canadian!

For each new morning with its light,
For rest and shelter of the night,
For health and food, for love and friends,
For everything Thy goodness sends.
~Ralph Waldo Emerson
Our Canadian Thanksgiving was back on October 11th, but best wishes to those celebrating Thanksgiving today in America, many of which are family of my very own who live across the border. May your bellies be full (but not too full) of healthy wholesome food!

Here I offer a few photos of vegan Thanksgiving meals taken from Flickr. You can click on each photo to be taken to it's Flickr page. Enjoy!

Vegan Thanksgiving Dinner

Vegan Thanksgiving Dinner

vegan thanksgiving feast

Vegan Thanksgiving

awesome vegan thanksgiving cooked by my mom and sandy

a vegan thanksgiving plate

Wednesday, November 24, 2010

A Simple & Appetizing Salad


This was my favourite lunch from this past weekend. A very simple salad of thinly sliced romaine and baby spinach, finely diced red onion, and half an avocado.

Instead of splashing some balsamic vinegar like I usually do, I dug out of the fridge the remaining vinaigrette I had made the other day. It's called Better Than Bottled Balsamic Vinaigrette (that it is!). You can find the recipe over at Angela's blog right here.

This salad was so wonderful that I couldn't stop Mmmmmm'ing the whole way through!

After a few forkfuls I had the presence
of mind to add some fresh ground pepper

On another note, if you like getting free things, Keri over at her I Eat Trees blog is having a giveaway contest. The book is Vegan Vittles, and it's on my wish list for sure. Check it out!

Tuesday, November 23, 2010

Lilibeth's Naturally Sweet Vegan Pumpkin Pie

Disclaimer: I fully acknowledge that the recipe instructions are wordy, but I'd rather make things really clear and share any tips that will ensure success!
A short while ago I tried out Vegan Spoonful's Homestyle Vegan Pumpkin Pie with much success. It was "just like grandma used to make". I blogged about it here.

The notion of making a pumpkin pie filling that had no refined sugar in it intrigued me. What about using date paste instead? Date paste is simply pitted medjool dates and a quantity of water processed until it's a smooth paste. Sugar, whether it's organic cane sugar or plain white sugar is devoid of nutrition. Dates on the other hand are a source of fiber, vitamin A, B vitamins, calcium, magnesium, potassium, copper, manganese and much more. Don't be mislead though, because even dates can hamper your weight loss goals.


My pumpkin pie filling also skips the use of salt, something I'm trying to avoid as per the nutritarian way of eating. I've upped the quantities of spices to make sure it has lots of taste. It's not overly sweet, unless of course you top it with something like EverydayDish.tv's Vegan Whipped Topping! Jon tried it plain and thought it was just as yummy as the first vegan pumpkin pie I tried. I was very happy with how it turned out!

For the crust I used No Roll, Never Fail, Press-In Pie Crust (Gluten Free, Dairy Free, Egg Free & More). It called for 1 tablespoon of sugar and I used my organic cane sugar. I won't be doing that again. It seemed that any sugar grains that were exposed or touching the glass pie plate turned black. So there are parts where the crust is speckled black. Kinda creepy. Next time I'd skip the sugar altogether.

click photo to see enlarged version IF you're curious

Here are a few vegan options for the pie crust:

  • No Roll, Never Fail, Press-In Pie Crust (Gluten Free, Dairy Free, Egg Free & More)
  • Dr. Fuhrman's Oat Crust

  • OR

    Almond-Oatmeal Pie Crust (found here)

    I plan to try this one next. I like that the fat content is natural and unrefined

    Ingredients:

    * 1-1/2 cups oatmeal ground into a coarse flour
    * 3/4 cups almonds finely chopped in processor
    * 1/4 teaspoon sea salt
    * 1/2 cup water, approximately

    How to make it:

    1. Mix the ingredients and roll out between 2 sheets of wax paper.
    2. Peel off the top sheet of paper.
    3. Place a 9 inch pie pan upside down on top of it then flip both over.
    4. Remove the other sheet of paper and trim to shape.
    5. Bake unfilled for 10 minutes in a 350F oven.
    6. Remove and fill with your pie filling and bake as needed.


    Lilibeth's Naturally Sweet Vegan Pumpkin Pie

    IMPORTANT: Before you do anything, take a square of aluminum foil and cut a circle out of it, one that will expose the filling but not the crust. This will protect the outer crust from burning. I suggest loosly placing it on the pie after it's been in the oven for 10 minutes or so.

    Ingredients:

    1 9" prepared crust
    1 14-oz can pureed pumpkin
    1 cup almond, rice, oat, hemp or soy milk
    3/4 cup date paste*
    3 Tbsp cornstarch
    1 tsp cinnamon
    1/2 tsp ground ginger
    1/2 tsp ground nutmeg
    1/4 tsp ground cloves
    1/8 tsp allspice

    *For the date paste you'll need approx. 16 medjool dates, pitted and split in half. Toss them in your food processor. Add about a 1/2 cup of water. You may need more, but start with processing this (start by pulsing) and see how it goes and then add more water as you see fit. You're going for a pureed pumpkin kind of consistency, so you want it to have substance. This will most likely make more than you'll, but store the remaining paste in a jar and save for smoothies or something.

    Instructions

    Preheat oven 350 degrees

    Prepare your homemade or store-bought crust. Place the rest of the ingredients into a large bowl and blend well with a hand mixer. Pour into prepared crust. If you're using an 8" pie crust, you may have leftover pie filling.

    Bake 1 hour, BUT after about 10 minutes place your aluminum foil crust protector over the pie, leaving the filling exposed.

    ALSO!! After about 30 minutes you may want to loosly cover the whole pie with another piece of aluminum foil. I mistakenly had the oven at 375 for the first 40 minutes instead of the 350 it should have been at, so I don't know if would be fine without the foil at the proper temperature (argh!!). Just do me a favour and keep an eye on it! Mine turned out fine in spite of my blunder.

    Monday, November 22, 2010

    Lilibeth's Smoky Comfort-in-a-Bowl Chili

    Becoming a nutritarian-vegan has vastly heightened my ability to enjoy preparing yummy food, whether raw or cooked. I've always admired people who love to cook. Maybe this new eating lifestyle was my personal catalyst since deep down inside there's always been a health nut screaming to come out and take over the reigns!

    It's been fun collecting up ingredients that I had never tried let alone heard of before, like liquid smoke. I'm sure the rest of the world has a bottle of this stuff in their cupboard but somehow it's existence had slipped past me unnoticed. It's the perfect addition to chili, what with that gorgeous hickory smell!

    This chili will not make your eyes water or set your tongue on fire, at least not from the get-go. Be assured, it does have a smoky kick to it that will build with every bite. You'll notice I used a wide array of spices and herbs, more than your average recipe. It smells and tastes wonderful!

    Jon says its the best I've ever made, and I've made some pretty awesome chili in my time. Score! According to him he wouldn't want it any spicier. Double score! If I wasn't out of cornmeal I'd be making my favourite cornbread as a go-along.


    Lilibeth's Smoky Comfort-in-a-Bowl Chili

    2 28oz. cans no-added-salt diced tomatoes, drained
    3 Tbsp no-salt tomato paste
    3 Tbsp date paste* (or 1 Tbsp natural granulated sugar etc.)
    2-3 portobella mushrooms, diced into 1/2" cubes
    1 whole garlic bulb (about 10 cloves), crushed
    1 medium onion, diced
    1 green bell pepper, diced
    1 yellow bell pepper, diced (or 1 cup of frozen corn)
    1 jalapeno pepper, seeded and finely diced (wear gloves!)
    2 celery stalks (plus some leaves), finely diced
    1/4 tsp liquid smoke
    1 Tbsp chili powder
    1 Tbsp unsweetened cocoa powder
    1 tsp smoked paprika (not regular paprika)
    1 tsp chipotle powder
    1 tsp ground cumin
    1 tsp herb de provence
    1 tsp dried basil
    1/2 tsp cinnamon
    1/4 tsp ground cloves
    1/8 tsp allspice
    1 tsp salt (or less if canned tomatoes have added salt - you be the judge)
    1 19oz. can red kidney beans, drained and rinsed well
    1 19oz. can chickpeas, drained and rinsed well
    1 19oz. can black beans, drained and rinsed well

    To avoid using processed sugar which lack nutrients, I encourage you to make some date paste. Dates are a source of fiber, vitamin A, B vitamins, calcium, magnesium, potassium, copper, manganese...get the picture!

    *Date Paste:

    approx. 8 medjool dates, pitted
    1/2 cup water to start

    Process in food processor. You may need more water depending on how dry the dates are. Add 1-2 Tbsp at a time. Store in glass jar in fridge. I confess it was really too small an amount of stuff to give my food processor to work with, but I persevered! The consistency I was going for was something that wasn't too runny. I wanted it concentrated.

    Okay, now on with the chili!


    Basically, throw it all into a good sized crock pot and mix well. I chose to saute the mushrooms before throwing them in, but it's really not necessary. I added the beans after mixing up everything else so they wouldn't become pulverized.

    substitute corn for the yellow pepper if you prefer

    Cook on low 8-10 hours, or high 5 hours or so. Actually I'm just guessing here. You'll know when it's done.

    right before the lid goes on and the crock pot is turned on

    Sunday, November 21, 2010

    Eat Your Greens Fruit Smoothie

    doesn't look like 'greens' to me, looks like chocolate!

    My 'Day 2' breakfast for the Eat to Live: Six Week Holiday Challenge was Dr. Fuhrman's Eat Your Greens Fruit Smoothie. I almost instinctively began to prepare my beloved oatmeal with flaxseed, blueberries and nuts again but remembered that I need to be more diligent about eating a variety of different meals.

    This smoothie was a treat! Yes it came out a sort of burgundy brown, reminding me of chocolate. I dare say it was so rich and thick and tasty that if I'd handed it to someone and said it had a hint of chocolate in it, they'd believe me.

    I find that my taste buds are becoming more sensitive to good food. When you have a regular diet of salty or sugary foods, it can lessen your taste bud's ability to pick up all the different flavours in natural food. Thankfully that can be turned around. You should have heard me eating my salad this afternoon! You would have thought I was eating decadent chocolate cheesecake!


    Dr. Fuhrman's 'Eat Your Greens Fruit Smoothie'

    Serves 1

    Ingredients:

    5 ounces baby spinach
    1 banana (lightly freckled and ripe)
    1 cup frozen or fresh blueberries
    1/2 cup unsweetened soy, hemp or almond milk
    1/2 cup pomegranate juice or other unsweetened fruit juice (I used water)
    1 tablespoon ground flaxseeds

    Instructions:

    Blend all ingredients in a high-powered* blender until smooth and creamy.

    *My blender is very basic, so I had to be patient and help things along (not before turning it off of course!). It was well worth the effort!

    Vegan on the Cheap - Lemony Garlic Chickpea Patties

    Supper #2 out of Robin Robertson's Vegan on the Cheap is another smashing success! And here's a testament to this cookbook: I had spent most of the afternoon working on a vegan chili for the weekend (which I will be sharing) and next thing you know it's an hour or so before supper time and I have no plans of what we're going to eat. I leafed through the book and decided on Lemony Garlic Chickpea Patties because I had almost everything it called for, except for green onions which I replaced with diced up onion. Oh yes and I didn't have near enough bread crumbs but I replaced the shortage with oatmeal flour.

    This cookbook is making switching my family to vegan meals a breeze!

    These babies are fun to make and even more fun to eat. They'd be perfectly suited to a warm summer night's meal, but they're way too good to reserve for just one season!

    It calls for hummus for dressing up the pita pocket and I made my old standby that I'll share some time. It's my mom's recipe and it's our family favourite. The best part is the recipe doesn't include any oil in addition to the tahini paste.

    very easy to shape patties


    I fried them in my iron skillet with some coconut oil. Yes this is a no-no for a nutritarian. Next time I'm going to do them on a parchment paper lined cookie sheet in the oven. I try to avoid using processed oil altogether, yes even olive oil. For the rare time that I do need to use oil, I like this brand of coconut oil below because it's organic, cold-pressed, and unrefined. If I'm a good girl, this jar will last us for a year!


    Now look at this scrumptious plate of goodness!! Talk about filling too! It would taste scary good with some Vegenaise added, but I really watch my fat intake now and I was a good girl and resisted.


    Love you Lemony Garlic Chickpea Patties!! Welcome to the family!

    Saturday, November 20, 2010

    Quite possibly one of the best cookies I've ever had!


    I really do have to get away from baking sweets, but I did it again. Last night before discovering and joining Dr. Fuhrman's Six Week Holiday Challenge I had already combined all the dry ingredients for the Vegan Chocolate Chip Cookies recipe Keri posted the other day over at her I Eat Trees blog. I figured I might as well go ahead and whip them up.
    Please note, just because something is "vegan" it does not automatically mean that it's healthy. Cakes and cookies are essentially junk food and to be avoided or at least reserved for very special occasions, and I don't mean "let's celebrate, it's the weekend!"
    Of course I wasn't going to eat any. Then I decided to have a very small piece so I'd know if they turned out okay. I took something of the equivalent of a 1 square inch piece to test it out. That little morsel sent my taste buds soaring into realms of delight! It tasted like toffee! Jon says they taste like a Skor bar! It just may be the best tasting most delectable cookie I've ever eaten! It's crunchy because it's not loaded with fat, but it's chewy at the same time. My teens gave them an enthusiastic thumbs up. [Don't get used to them kids!!]

    Mine look kinda flat compared to Keri's much prettier specimens, but I'm figuring that's because instead of half the flour being whole wheat pastry flour, I used whole wheat flour. Where does a Canadian get whole wheat pastry flour anyway? Oh I just noticed that I forgot to flatten them slightly before putting them into the oven! No matter, they turned out really well, unfortunately.

    Veggie Burgers, Caesar Salad Dressing, and Naturally Fat-Free Ice Cream!

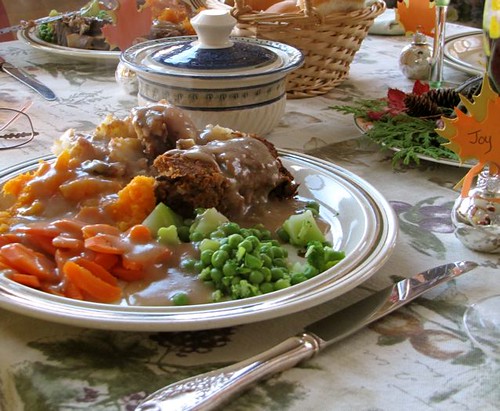
    Believe it or not, this meal absolutely had me stuffed! I could barely finish my cauliflower! I share the salad dressing recipe below.

    The other evening I tried one of Dr. Fuhrman's recipes. I have his book, "Eat to Live". It put me on the track to becoming a vegan.

    The recipe is for Walnut Lentil Veggie Burgers (recipe below). They were very yummy! I may add some more herbs and spices next time, maybe not. It has lots of potential for becoming outstanding!

    Jon (hubby) really liked them, so much so that my hopes of having leftovers for another meal were dashed. They're pretty darn good. The kids ate theirs all up. They have definitely made it into our meal rotation.

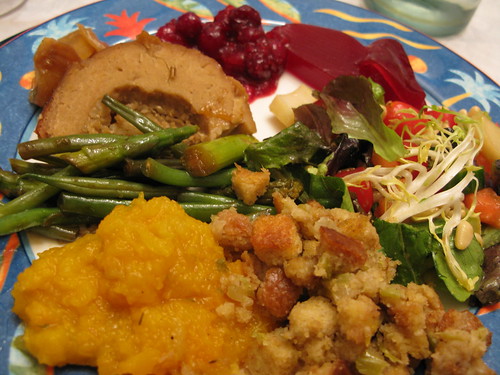
    They look a little overdone, but really they weren't.

    Dr. Fuhrman's Walnut Lentil Veggie Burgers

    Makes 8

    2 cups onion, diced
    2 carrots, diced
    1/2 bell pepper, diced (I didn't have any)
    5 large cloves garlic, minced
    2 tablespoons VegiZest (I used 1 veggie bouillon cube in the water)
    2 teaspoons Italian Seasoning
    3 tablespoons Balsamic Vinegar
    1-1/4 cup water
    4 tablespoons no-salt added tomato paste
    2 cups cooked lentils, drained
    1-1/2 tablespoon ground flax seed
    1-1/2 tablespoon raw sesame tahini
    1-1/2 tablespoon nutritional yeast
    1 tablespoon no-salt mustard
    1/2 cup walnuts, finely chopped (I used pecans)
    1/4 cup oatmeal, ground
    2 tablespoons whole wheat pastry flour
    2 tablespoons parsley, minced (I used 1 Tbsp dried parsley)

    Directions

    Sauté onion, carrots, bell pepper and garlic in a large pan until softened, adding water, if necessary, to prevent sticking, about 5-6 minutes.

    I sliced the carrots in the food processor, and then put in my S-blade and pulsed them until they were finely chopped

    I prepared all the wet ingredients in advance (not including the tahini and mustard)

    Add VegiZest, Italian seasonings, balsamic vinegar, water, tomato paste, and stir well. Simmer, covered, for about 5-7 minutes. Uncover and cook an additional 5 minutes until thick.

    I mixed up all the dry ingredients up together. In hindsight, I should have processed the nuts a little finer

    Transfer to a mixing bowl and let cool a few minutes. Add lentils and remaining ingredients and mix well by hand. Cover and refrigerate at least 30 minutes, or until ready to bake.

    Preheat oven to 350 degrees. Lightly spray a baking pan with oil. Take about a rounded 1/3 cup of the mixture, form into balls, and place on baking sheet. Using a moistened flat bottomed glass or jar, flatten balls into a burger shape. Bake for 12 minutes, turn over and bake an additional 12 minutes until lightly browned.

    * Serves 8.

    Vegan Caesar Salad Dressing

    I have no idea where I got this recipe from! I have adapted it somewhat, that I do know. No matter, it's very yummy! As a nutritarian-vegan I have to limit my use of it due to the processed oil, but it's nice for an occassional fancy treat for the family (okay and me!).

    2 Tbsp Dijon mustard
    2 Tbsp nutritional yeast flakes
    2 Tbsp ground almonds
    2-3 garlic cloves, crushed
    2 Tbsp water
    1 Tbsp lemon juice
    1 Tbsp red wine vinegar
    1/2 Tbsp low-sodium soy sauce
    1 Tbsp oil
    1/8 tsp pepper
    (I have yet to do this but you could add a pinch or two of salt)

    With a hand mixer, combine the first 4 ingredients. It will form a paste. Beat in remaining ingredients--I usually combine them first and gradually pour it all in while beating.

    Pour into small mason jar and refrigerate.

    Moving onto ice-cream...

    Who doesn't love ice cream?! Take a look at this dish of scrumptious non-dairy fat free ice cream down yonder. It's frosty and creamy, everything you'd expect from a really good soft ice cream. It's Dr. Fuhrman's Banana Fluff recipe with a little unsweetnened cocoa powder thrown in.

    I don't have a VitaMix yet, but I did well using my food processor. I tried using my blender but it could not deal with the frozen banana even though I had broken in up into 1" pieces before freezing. You'll need 1 banana per serving.

    I'm definitely going to be on the lookout for more non-dairy frozen dessert recipes!

    I detest flash photography but
    the urge to try this recipe
    struck at night!

    Chocolate Banana Fluff

    1 serving

    1 frozen chopped or broken up banana*
    1/4 cup almond, rice, or other non-dairy milk
    a splash of vanilla extract
    2 tsp cocoa powder (next time we're upping it to 1 Tbsp)

    Throw it all in your food processor or high-powered blender and process until smooth. Pulsing it seems to help. Dish out and enjoy!

    My teens loved it even though they're not big fans of banana. What a great way to treat your little ones to a healthy frozen dessert!

    *do this a day ahead, peel and chop up (if you just have a food processor like me) a ripe banana, throw into a ziploc baggie and toss in freezer.